Using Swift for your CLI Tools
Swift is a language widely known for its use in developing applications for iOS, macOS, watchOS, and tvOS. Often in our teams, we encounter command-line tools written in other languages, such as bash, and frequently not everyone on the team has expertise in it. This leads to that the responsibility for its maintenance falls on just a small portion of the team.
In this article, we will discuss a simple way to write command-line tools in Swift, how to use more than one .swift file, and how to structure your code into different local packages to make it more scalable and parse arguments on your command.
Scripting in a single Swift File (The ugly way)
Sometimes, we might want to create something simple that requires nothing more than a single .swift file that can be executable.
- Create our file script.swift
touch script.swift
- Add the shebang on the first line, which tells the system how this file should be executed, and then write our Swift code. In this instance, we'll use the often overlooked Hello, world! 😅
#!/usr/bin/swift
print("Hello, world!)
- Make the script executable.
chmod +x script.swift
- Run it from our terminal.
./script.swift
or
swift script.swift
Note: The caveat is that this way, we won't have access to specific APIs or be able to utilize third-party libraries. Moreover, your script will be entirely written in a single file, making it cumbersome to work with as it grows.
Creating Our Command Line Tool as a Project
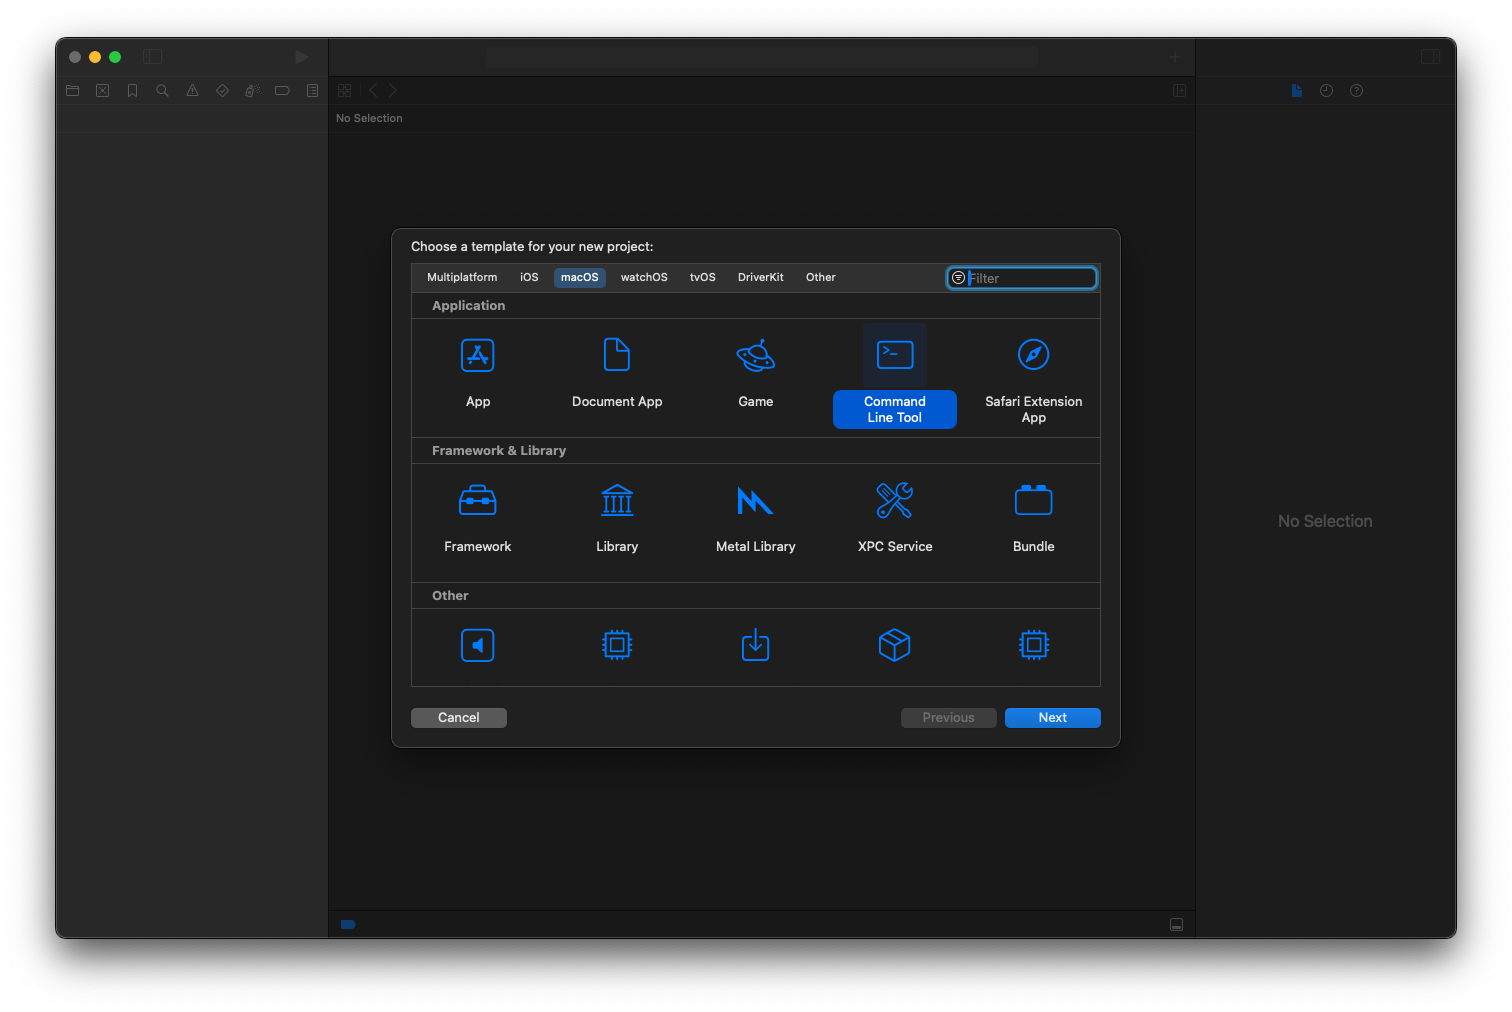
First, we'll create a new project in Xcode and select the Command Line Application option.

Adding Third-Party Libraries
To demonstrate how adding third-party libraries is just as easy as in an iOS project, we will include a fundamental one to accept arguments in your script. It's an Apple library called ArgumentParser.
We will add it like any other Swift Package Manager package.
Once we have our project set up, we will delete the main.swift file to create our own, which will serve as the entry point to our script.
import Foundation
import ArgumentParser

@main
struct myCLITool: ParsableCommand {
    mutating func run() throws {
        print("Hello, world")
    }
}
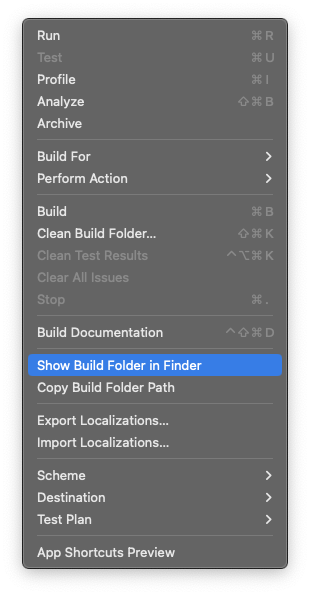
If we build the project, it will generate a binary file of our project, which we can execute from our terminal. You can find it in the Products menu of Xcode.

Currently, if we run our product from the terminal, we will get the same result as when we developed our script in a single .swift file. However, the advantage now is that we have full control over a project where we can create a fully testable, much more scalable script and in which we can use third-party tools.
Let's do something more than a simple Hello, World! by using the ArgumentParser library to see how this tool can greatly enhance our script.
Initially, we can see that without doing much, this library provides us with help when launching our script, outputting in the Log what each parameter is. We modify our script as follows:
@main
struct myCLITool: ParsableCommand {
    @Argument(help: "Input value to print")
    var input: String

    mutating func run() throws {
       print(input)
    }
}
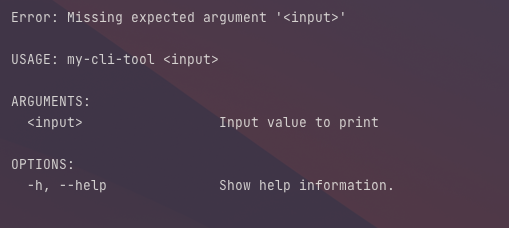
If we execute our script without any parameters, we will get the following:

We can see that it shows us the error for not inserting a mandatory argument and a help message which lists the arguments and options our script accepts. All of this comes at no extra cost, just by adding this library.
Let's make some more examples.
Let's write a hasher, which, when passed a string as a parameter, hashes it and prints it in the terminal, and also allows you to specify the type of hash you want to apply to your string.
The first thing we will do is import the CryptoKit library to have access to the different SHA.
Next, we'll create our HasherType and conform to ExpressibleByArgument so that we can use it as an option by the ArgumentParser library.
enum HasherType: String, ExpressibleByArgument {
        case sha256
        case sha384
        case sha512
}
Having our HasherType created, we can start working on our script:
@main
struct myCLITool: ParsableCommand {
	//1
    @Argument(help: "Value to hash")
    var input: String

	//2
    @Option(name: .shortAndLong, help: "hash type, by default SHA256, options: sha256, sha384, sha512")
    var type: HasherType = .sha256

    mutating func run() throws {
        let inputData = Data(input.utf8)
        printHash(with: inputData, hasher: type)
    }

    //3
    private func printHash(with input: Data, hasher: HasherType) {
        var hashValue: String
        switch hasher {
        case .sha256:
            hashValue = SHA256.hash(data: input).description
        case .sha384:
            hashValue = SHA384.hash(data: input).description
        case .sha512:
            hashValue = SHA512.hash(data: input).description
        }
        print(hashValue)
    }
}
- We define our argument, in this case, it is the String we want to process. Keep in mind that it is a mandatory argument.
- We define our
HasherTypeas an optional argument and give it a default value, in this case,.sha256.
- This private function evaluates the type of hasher selected and prints it.
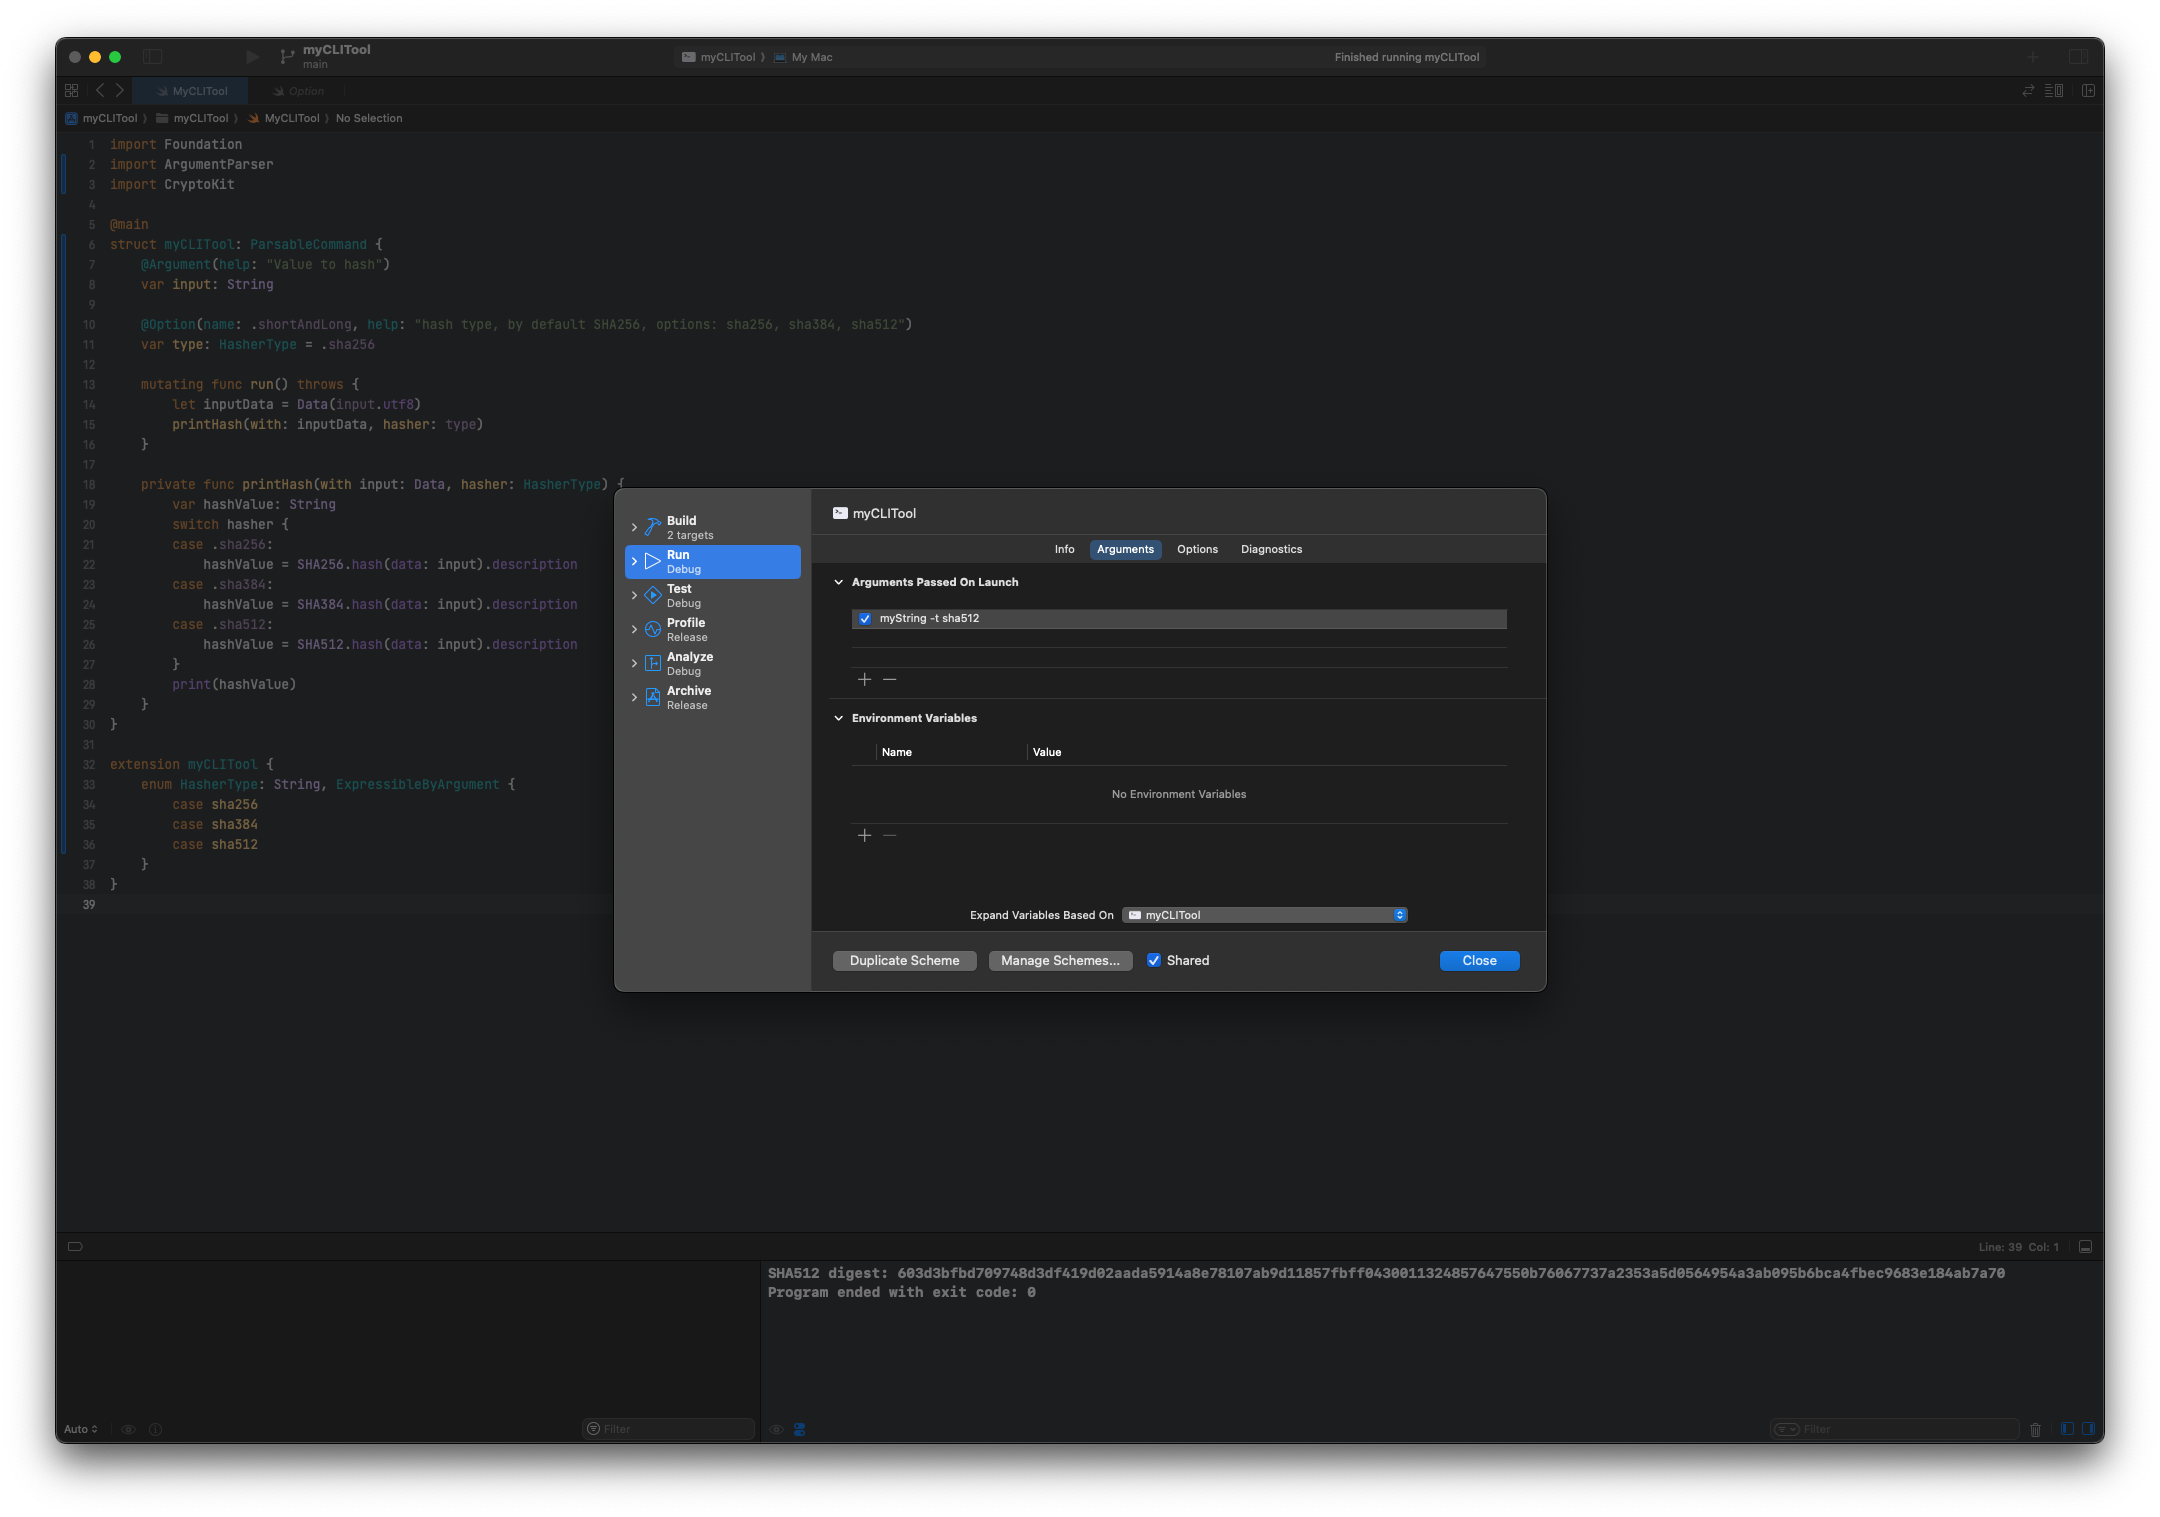
One way to test our script by passing arguments is in the options of our Target. If we go to the Run section, in the Arguments tab we can define the arguments we want when executing it.

Once we have finished our script, we can move the executable to /usr/local/bin/ to be able to run it in the terminal from the PATH.
sudo mv ~/Library/Developer/Xcode/DerivedData/myCLITool-gxxmdqynodgukpeqelyxvuxbnvmm/Build/Products/Debug/myCLITool /usr/local/bin/
In upcoming installments, we will tackle significant topics such as testing and modularization, as well as other crucial subjects like background jobs.